

 English
 русский
 Español
 Français
 Português
 عربى
عربى



+86-13588556918
Content
- 1 How Can I Quickly Fix Common Truck-Dumper Problems?
- 2 Understanding the Root Causes of Truck-Dumper Failures
- 3 Truck-Dumper Hydraulic Repair: Step-by-Step Diagnosis and Fixes
- 4 Truck-Dumper Brake Issues: Diagnosing and Restoring Safe Stopping Power
- 5 Truck-Dumper Lifting Mechanism Repair: Pivot Points, Arms, and Cylinders
- 6 Truck-Dumper Troubleshooting Guide: Electrical, Sensor, and Control System Faults
- 7 Truck-Dumper Maintenance Tips: Building a Preventive Schedule That Works
- 8 Structural Integrity: Frame Inspection and Weld Assessment
- 9 Operator Practices That Prevent Premature Failures
- 10 Frequently Asked Questions About Truck-Dumper Problems
How Can I Quickly Fix Common Truck-Dumper Problems?
The fastest way to fix common truck-dumper problems is to follow a structured troubleshooting sequence: check hydraulic fluid levels, inspect brake components, test the lifting mechanism under no load, and verify electrical connections — in that order. Most field failures fall into four categories: hydraulic system faults, brake malfunctions, lifting mechanism issues, and electrical/sensor failures. Addressing these systematically can resolve up to 85% of breakdowns without specialist intervention, reducing costly downtime on site. This guide walks you through each category with specific diagnostics, repair steps, and real-world data to help you act fast and effectively.
Understanding the Root Causes of Truck-Dumper Failures
Before diving into repairs, understanding what causes truck-dumper problems in the first place gives maintenance teams a significant advantage. Industry maintenance records indicate that hydraulic issues account for approximately 42% of all truck-dumper service calls, followed by brake-related problems at 28%, lifting mechanism faults at 18%, and electrical/control system failures at 12%.
Operational stress is the primary driver. Truck-dumpers cycle through thousands of load-and-tilt sequences per year. A mid-size quarry or recycling facility may run its dumper through 200–400 full cycles daily, placing enormous cumulative stress on seals, valves, pivot points, and brake pads. Deferred maintenance, incorrect fluid grades, and operating beyond rated load capacity accelerate wear considerably.
Truck-Dumper Failure Distribution by Category
Seasonal factors also matter. Cold weather thickens hydraulic oil, increasing pump strain in winter months. Summer heat accelerates seal degradation. Facilities operating in climates with temperature swings exceeding 40°C annually report 30% higher seal replacement frequency compared to temperate environments.
Truck-Dumper Hydraulic Repair: Step-by-Step Diagnosis and Fixes
Hydraulic system problems are the most frequent and, when caught early, the most straightforward to fix. Symptoms include slow or incomplete bed lift, jerky movement, visible oil leaks around cylinder rods, and unusual pump noise.
Step 1 — Check Fluid Level and Condition
With the bed fully lowered, inspect the reservoir sight glass or dipstick. Fluid should be at the full mark, clear to amber in color, and free of milky discoloration (which signals water contamination). Low fluid is the single most common hydraulic complaint and is corrected in under five minutes. Always use the manufacturer-specified viscosity grade; using ISO 46 when ISO 68 is required can cause cavitation at operating temperature.
Step 2 — Inspect Seals and Hoses
Run a full raise-and-hold cycle. Place clean cardboard under the cylinder rods and check for drips after 10 minutes at full extension. A seeping rod seal typically produces a thin oil film; a failed seal causes a visible drip. Rod seal replacement costs roughly 1/10th of a full cylinder rebuild and should always be the first repair attempted. Hose inspection should look for cracking, abrasion, and swelling near fittings — pressurized hoses that appear bulged must be replaced immediately.
Step 3 — Test the Pump and Relief Valve
Use a calibrated hydraulic pressure gauge at the pump outlet port. Normal operating pressure for most truck-dumper systems falls between 2,500 and 3,500 PSI. Readings below 2,000 PSI under load suggest pump wear or a relief valve set too low. Relief valves are adjustable — refer to the OEM pressure specification before making any changes. A valve stuck open will cause the system to feel "soft"; a valve stuck closed creates dangerous over-pressure conditions.
Step 4 — Bleed Air from the System
Spongy or inconsistent lift cycles often result from air entrained in the hydraulic fluid. Cycle the bed up and down 10–15 times with no load to purge air back to the reservoir. If the symptom persists, locate the bleed screws on each cylinder end cap, crack them open slightly during a slow raise, and close once clear fluid — not foam — emerges.
Truck-Dumper Brake Issues: Diagnosing and Restoring Safe Stopping Power
Brake problems on truck-dumpers present differently from standard vehicle brakes because these systems often integrate pneumatic hold-down brakes, wheel brakes, and emergency/parking brake circuits simultaneously. A truck-dumper that drifts under load or fails to hold a tilted bed stationary has an active safety hazard and must be taken out of service immediately.
Common Brake Symptoms and Their Likely Causes
| Symptom | Probable Cause | Urgency | First Action |
|---|---|---|---|
| Bed drifts down under load | Hold-down brake slip or hydraulic lock valve fault | Critical | Remove from service |
| Squealing during wheel brake application | Worn brake pads / glazed rotors | High | Inspect pad thickness |
| Pulling to one side when braking | Uneven pad wear or stuck caliper | High | Compare pad thickness side-to-side |
| Parking brake won't hold on grade | Stretched cable or worn drum shoes | High | Adjust cable tension first |
| Low air pressure warning active | Air compressor fault or line leak | Critical | Soap-test all air lines |
Brake Pad Replacement Interval Guidelines
Brake pad minimum thickness is typically 3 mm for organic pads and 2 mm for sintered metal pads. In high-cycle operations (300+ dumps per day), pads may reach minimum thickness in as few as 60 days. Establishing a monthly pad-thickness check routine — logged per axle position — prevents unexpected failures. Replace both pads on an axle simultaneously to preserve even braking force.
For pneumatic hold-down brake circuits: verify system air pressure remains above 690 kPa (100 PSI) during all operational phases. A pressure drop below this threshold typically triggers an automatic failsafe that locks the bed down — but a degraded air system that doesn't trigger the failsafe is far more dangerous.
Truck-Dumper Lifting Mechanism Repair: Pivot Points, Arms, and Cylinders
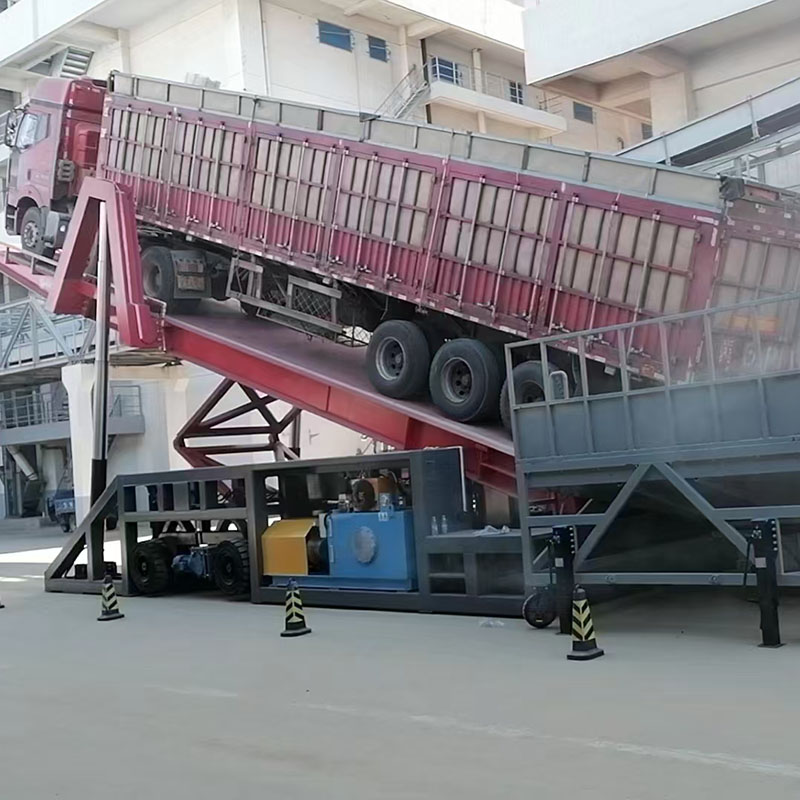
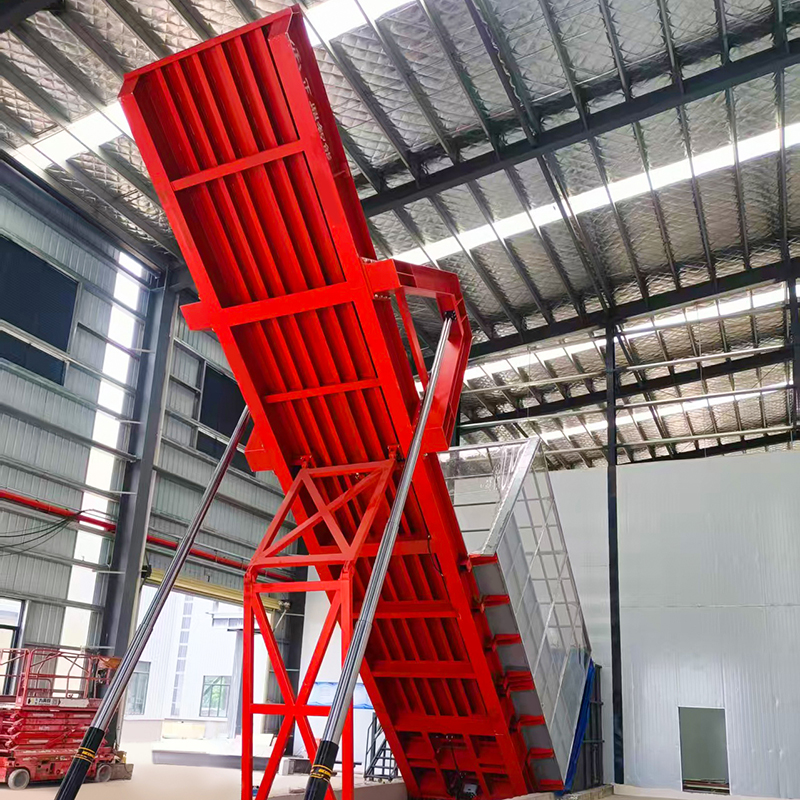
The lifting mechanism converts hydraulic force into controlled bed rotation. It includes the main lift cylinder(s), pivot pins, cross-members, safety props, and often a secondary stabilizer linkage. Wear in the pivot assembly is cumulative and rarely catastrophic when caught early; ignored, it accelerates cylinder side-loading and dramatically shortens service life.
Inspecting and Replacing Pivot Pins and Bushings
With the bed fully lowered and the machine locked out/tagged out, use a pry bar to check lateral play at each pivot point. Acceptable play is generally less than 1.5 mm; anything beyond 3 mm indicates a worn bushing that should be replaced before the next operational shift. Worn bronze bushings are inexpensive — typically replaced in sets — but the labor to access them can be significant if left until they score the pin itself.
Greasing pivot points at the manufacturer-specified interval (commonly every 50–100 operating hours) is the single highest-return maintenance task available. Sites that implement a formal grease schedule report pivot pin service life extending from an average of 14 months to over 36 months.
Cylinder Alignment and Side-Load Check
A misaligned lift cylinder introduces side-loading that wears rod seals prematurely and can crack weld joints on the bed frame. To check alignment, extend the cylinder to 50% stroke with no load and observe the rod from directly in front of the machine. The rod should track along the cylinder's central axis without visible angular deviation. If the rod appears to bend toward one side, the cylinder clevis mount has shifted and must be repositioned before continued use.
Pivot Pin Service Life: With vs. Without Grease Schedule (Months)
Safety Props and Secondary Locking Devices
Every truck-dumper should be equipped with a mechanical safety prop — a rigid strut that physically prevents the bed from descending during inspection or maintenance. Never work under a raised bed supported only by hydraulic pressure. Inspect safety props for cracks, deformation, and secure attachment points each shift. Props that show visible bending should be replaced immediately; a deformed prop may fail under bed weight.
Truck-Dumper Troubleshooting Guide: Electrical, Sensor, and Control System Faults
Modern truck-dumpers integrate programmable logic controllers (PLCs), proximity sensors, load cells, and CAN bus communications. While these systems improve safety and automation, they also introduce failure modes that differ fundamentally from mechanical faults. Electrical faults account for 12% of service calls but often take the longest to diagnose without systematic methodology.
Reading Fault Codes and PLC Diagnostics
Most current-generation dumper control panels display alphanumeric fault codes when a sensor or circuit reports out-of-range values. Always record the exact fault code before clearing it — clearing without noting the code loses valuable diagnostic data. Cross-reference the code against the OEM fault code index. Common codes include:
- E01 / F01: Tilt angle sensor out of range — check sensor mounting and wiring harness for chafing.
- E04 / F04: Overload condition detected — verify load cell calibration before clearing.
- E07 / F07: Hydraulic pressure sensor fault — inspect sensor connector and test resistance at sensor terminals.
- E12 / F12: Emergency stop circuit open — trace E-stop button circuit for broken continuity or corroded contacts.
- E15 / F15: Communication loss between PLC and remote operator panel — inspect CAN bus termination resistors and check cable continuity.
Proximity Sensor Inspection and Replacement
Proximity sensors detect bed-down, bed-up, and intermediate tilt positions. A faulty "bed-down" sensor will prevent the machine from accepting a new truck because the PLC believes the bed has not fully returned. To test: use a multimeter on the sensor output wire — it should read a clean high (typically 24 VDC) or low (0 V) signal with no noise or intermediate values. A sensor that reads mid-voltage is failing and must be replaced.
Truck-Dumper Subsystem Diagnostic Health Comparison (Well-Maintained vs. Deferred Maintenance)
Wiring Harness and Connector Maintenance
Vibration and contamination are the main enemies of electrical reliability on truck-dumpers. Inspect all cable ties for breakage and re-secure any harness sections that contact moving parts or sharp edges. Clean Deutsch and AMP connectors with contact cleaner spray annually; apply dielectric grease to the mating surfaces to prevent moisture intrusion. Corroded connectors are the leading cause of intermittent sensor faults and often go undetected until they cause a nuisance shutdown.
Truck-Dumper Maintenance Tips: Building a Preventive Schedule That Works
Reactive maintenance — fixing what breaks — costs on average three to five times more per event than equivalent preventive work when downtime, emergency labor, and collateral damage are included. A structured preventive maintenance (PM) program is the most impactful operational decision a fleet manager can make.
Recommended Maintenance Intervals by Task
- Daily (pre-shift): Check hydraulic fluid level, inspect hoses for visible damage, verify safety prop condition, confirm brake warning lights are clear, check tire pressure on mobile dumpers.
- Weekly: Grease all pivot points and cylinder pins, clean sensor faces, inspect brake pad thickness, check battery terminals on electrically-driven units.
- Monthly: Full hydraulic system pressure test, inspect all wiring harnesses and connectors, check relief valve settings, lubricate all slide surfaces and guide rails.
- Quarterly: Replace hydraulic return-line filter, inspect cylinder rod chroming for pitting, verify PLC parameter settings against factory baseline, load-test brake hold force.
- Annually: Full hydraulic fluid replacement (or based on oil analysis results), complete bushing wear inspection and replacement as needed, full structural inspection of bed frame and welds, recalibrate all load cells and angle sensors.
Facilities that transition from reactive to preventive maintenance typically report unplanned downtime reductions of 60–70% within the first 12 months. The key enabler is consistent logging — a simple spreadsheet tracking task, date, technician, and any findings gives management the data needed to identify patterns and adjust intervals intelligently.
Average Unplanned Downtime Hours Per Quarter: Before and After PM Program
Spare Parts Inventory Recommendations
Maintaining a small on-site spare parts inventory eliminates the most common cause of extended downtime: waiting for parts. For a single-dumper operation, a practical minimum inventory includes: one full rod seal kit per cylinder model, two sets of brake pads, one replacement proximity sensor per type in use, one hydraulic return-line filter, and one full set of pivot bushings. This inventory typically represents less than 0.5% of the machine's capital value and can prevent downtime events lasting days.
Structural Integrity: Frame Inspection and Weld Assessment
The structural frame is often overlooked in routine maintenance because visible cracking or deformation develops slowly. However, a crack propagating from a weld toe in the bed pivot area can reach critical length in as few as 30 days of high-cycle operation if not detected and repaired early.
Quarterly structural inspections should focus on: the main pivot box section where the bed hinge attaches to the main frame; the cylinder mount brackets on both the bed and chassis; the cross-members under the bed floor near the center of gravity; and any previous weld repair areas, which are statistically more likely to crack again if not properly stress-relieved during original repair.
Magnetic particle testing (MT) or dye penetrant testing (PT) can reveal subsurface cracks invisible to the naked eye. For machines with more than five years of high-cycle operation, annual MT inspection of primary weld joints is strongly recommended. Early crack detection allows stop-drill and weld repair; undetected cracks may progress to catastrophic fracture requiring full section replacement — a cost difference measured in multiples.
Operator Practices That Prevent Premature Failures
Equipment condition is only partially determined by maintenance quality — operator behavior plays an equally significant role. Studies of high-cycle dumper operations consistently show that operator-induced failures account for approximately 22% of all non-wear-related component damage.
Key operator behaviors that extend machine life include: never initiating a raise cycle before the incoming truck is fully positioned and wheel chocks are set; always allowing the bed to reach the full-down position and confirm the "bed down" indicator before accepting the next truck; avoiding rapid cycling (waiting a minimum 5 seconds between full cycles for oil temperature equalization); and never operating with a warning lamp or fault code active without first logging and investigating the cause.
Operator training refreshers conducted every six months — even for experienced personnel — have been shown to reduce operator-induced component damage by up to 35% in documented fleet management programs. A 30-minute refresher covering the top five observed bad habits is often sufficient.
Frequently Asked Questions About Truck-Dumper Problems
Q1: How do I know if my truck-dumper's hydraulic pump needs replacing or just servicing?
A: Test system pressure at the pump outlet with a calibrated gauge. If pressure falls more than 15% below the specified operating range under load, and the relief valve is correctly set, the pump's internal efficiency has degraded. Pump noise — particularly a high-pitched whine or cavitation knock — also signals internal wear. A pump with worn gears or vanes may respond temporarily to a fluid change and filter replacement, but if pressure cannot be restored to within 10% of specification after these steps, replacement is the appropriate course of action. Continuing to operate a severely degraded pump accelerates wear throughout the entire hydraulic circuit.
Q2: My truck-dumper bed lifts slowly on one side. What causes this and how do I fix it?
A: Uneven lift most commonly results from a flow-divider valve fault, a partially blocked cylinder feed line, or unequal cylinder rod binding due to misalignment. Start by checking that both cylinder feed lines are free of kinks and that the flow-divider valve — which splits pump output equally between two cylinders — has clean, unobstructed passages. Disassemble and flush the divider if dirt contamination is suspected. If the divider checks out, extend both cylinders individually by isolating each one at the control valve; a cylinder that extends slower in isolation has an internal bypass problem and needs seal replacement or rebuild. Misalignment causing binding will be visible as angular deviation of the rod during extension.
Q3: How often should I change the hydraulic fluid on a truck-dumper?
A: Most OEM specifications call for hydraulic fluid replacement every 2,000 operating hours or annually, whichever comes first under normal conditions. However, high-cycle operations, contamination events, or evidence of overheating should trigger earlier changes. The most reliable approach is oil analysis: send a 100 ml sample to a laboratory every 500 hours. Analysis results for total acid number (TAN), viscosity index change, particle count, and water content tell you precisely whether the oil is still serviceable or needs replacing — allowing data-driven decisions rather than arbitrary intervals. Machines in cold-weather environments may also benefit from a seasonal viscosity grade change.
Q4: The emergency stop on my truck-dumper activates unexpectedly during operation. How do I troubleshoot this?
A: Spurious emergency stop activations are almost always caused by an intermittent open circuit in the E-stop loop rather than the button itself being pressed. Inspect all E-stop buttons and pull-cord switches for loose or corroded terminal connections — even a loose screw on one terminal can cause the circuit to open momentarily under vibration. Use a multimeter in continuity mode to trace the entire E-stop circuit while the machine vibrates (a rubber mallet on nearby structures simulates operating vibration). Any point where continuity is lost under simulated vibration is the fault location. Also check the PLC's digital input card for the E-stop channel — contact your OEM for the correct input voltage specification to rule out a failing input module.
Q5: What is the correct procedure for replacing a lift cylinder seal on a truck-dumper without special tools?
A: Begin with the machine locked out and tagged out, bed fully lowered. Relieve residual hydraulic pressure by cycling the control lever multiple times after shutdown. Disconnect the cylinder's hydraulic lines and immediately cap all ports to prevent contamination. Remove the cylinder by extracting the clevis pins at both ends — a slide hammer or press may be needed for tight fits. On a workbench, unthread the gland nut using a spanner wrench (a C-spanner can be fabricated from flat bar if unavailable). Pull the gland off the rod and slide out the old seals. Clean all metal surfaces before installing new seals — any debris will cut the new seals during first pressurization. Lubricate new seals with clean hydraulic oil, install in the correct orientation (lip faces the pressure side), reassemble, and torque the gland nut to OEM specification. Always bench-test the rebuilt cylinder at low pressure before full reinstallation.
Q6: How do I safely test the brake hold capacity of a truck-dumper without specialized test equipment?
A: A functional brake hold test can be performed with a standard loaded truck and a calibrated inclinometer or smartphone angle app. Position the dumper on a known grade — ideally 10–15% slope, which represents a realistic worst-case site condition. Apply the full brake system (both wheel brakes and hold-down brakes where applicable) with a loaded truck in the dumping position. The truck should remain completely stationary for a minimum of 3 minutes with no measurable movement. Place chalk marks on the tires and the ground for reference. Any movement of chalk marks or a PLC-logged position change indicates insufficient brake holding force. Before conducting this test, always ensure the area is clear of personnel and that a secondary mechanical chock is available as a backup safety measure.


